Overview
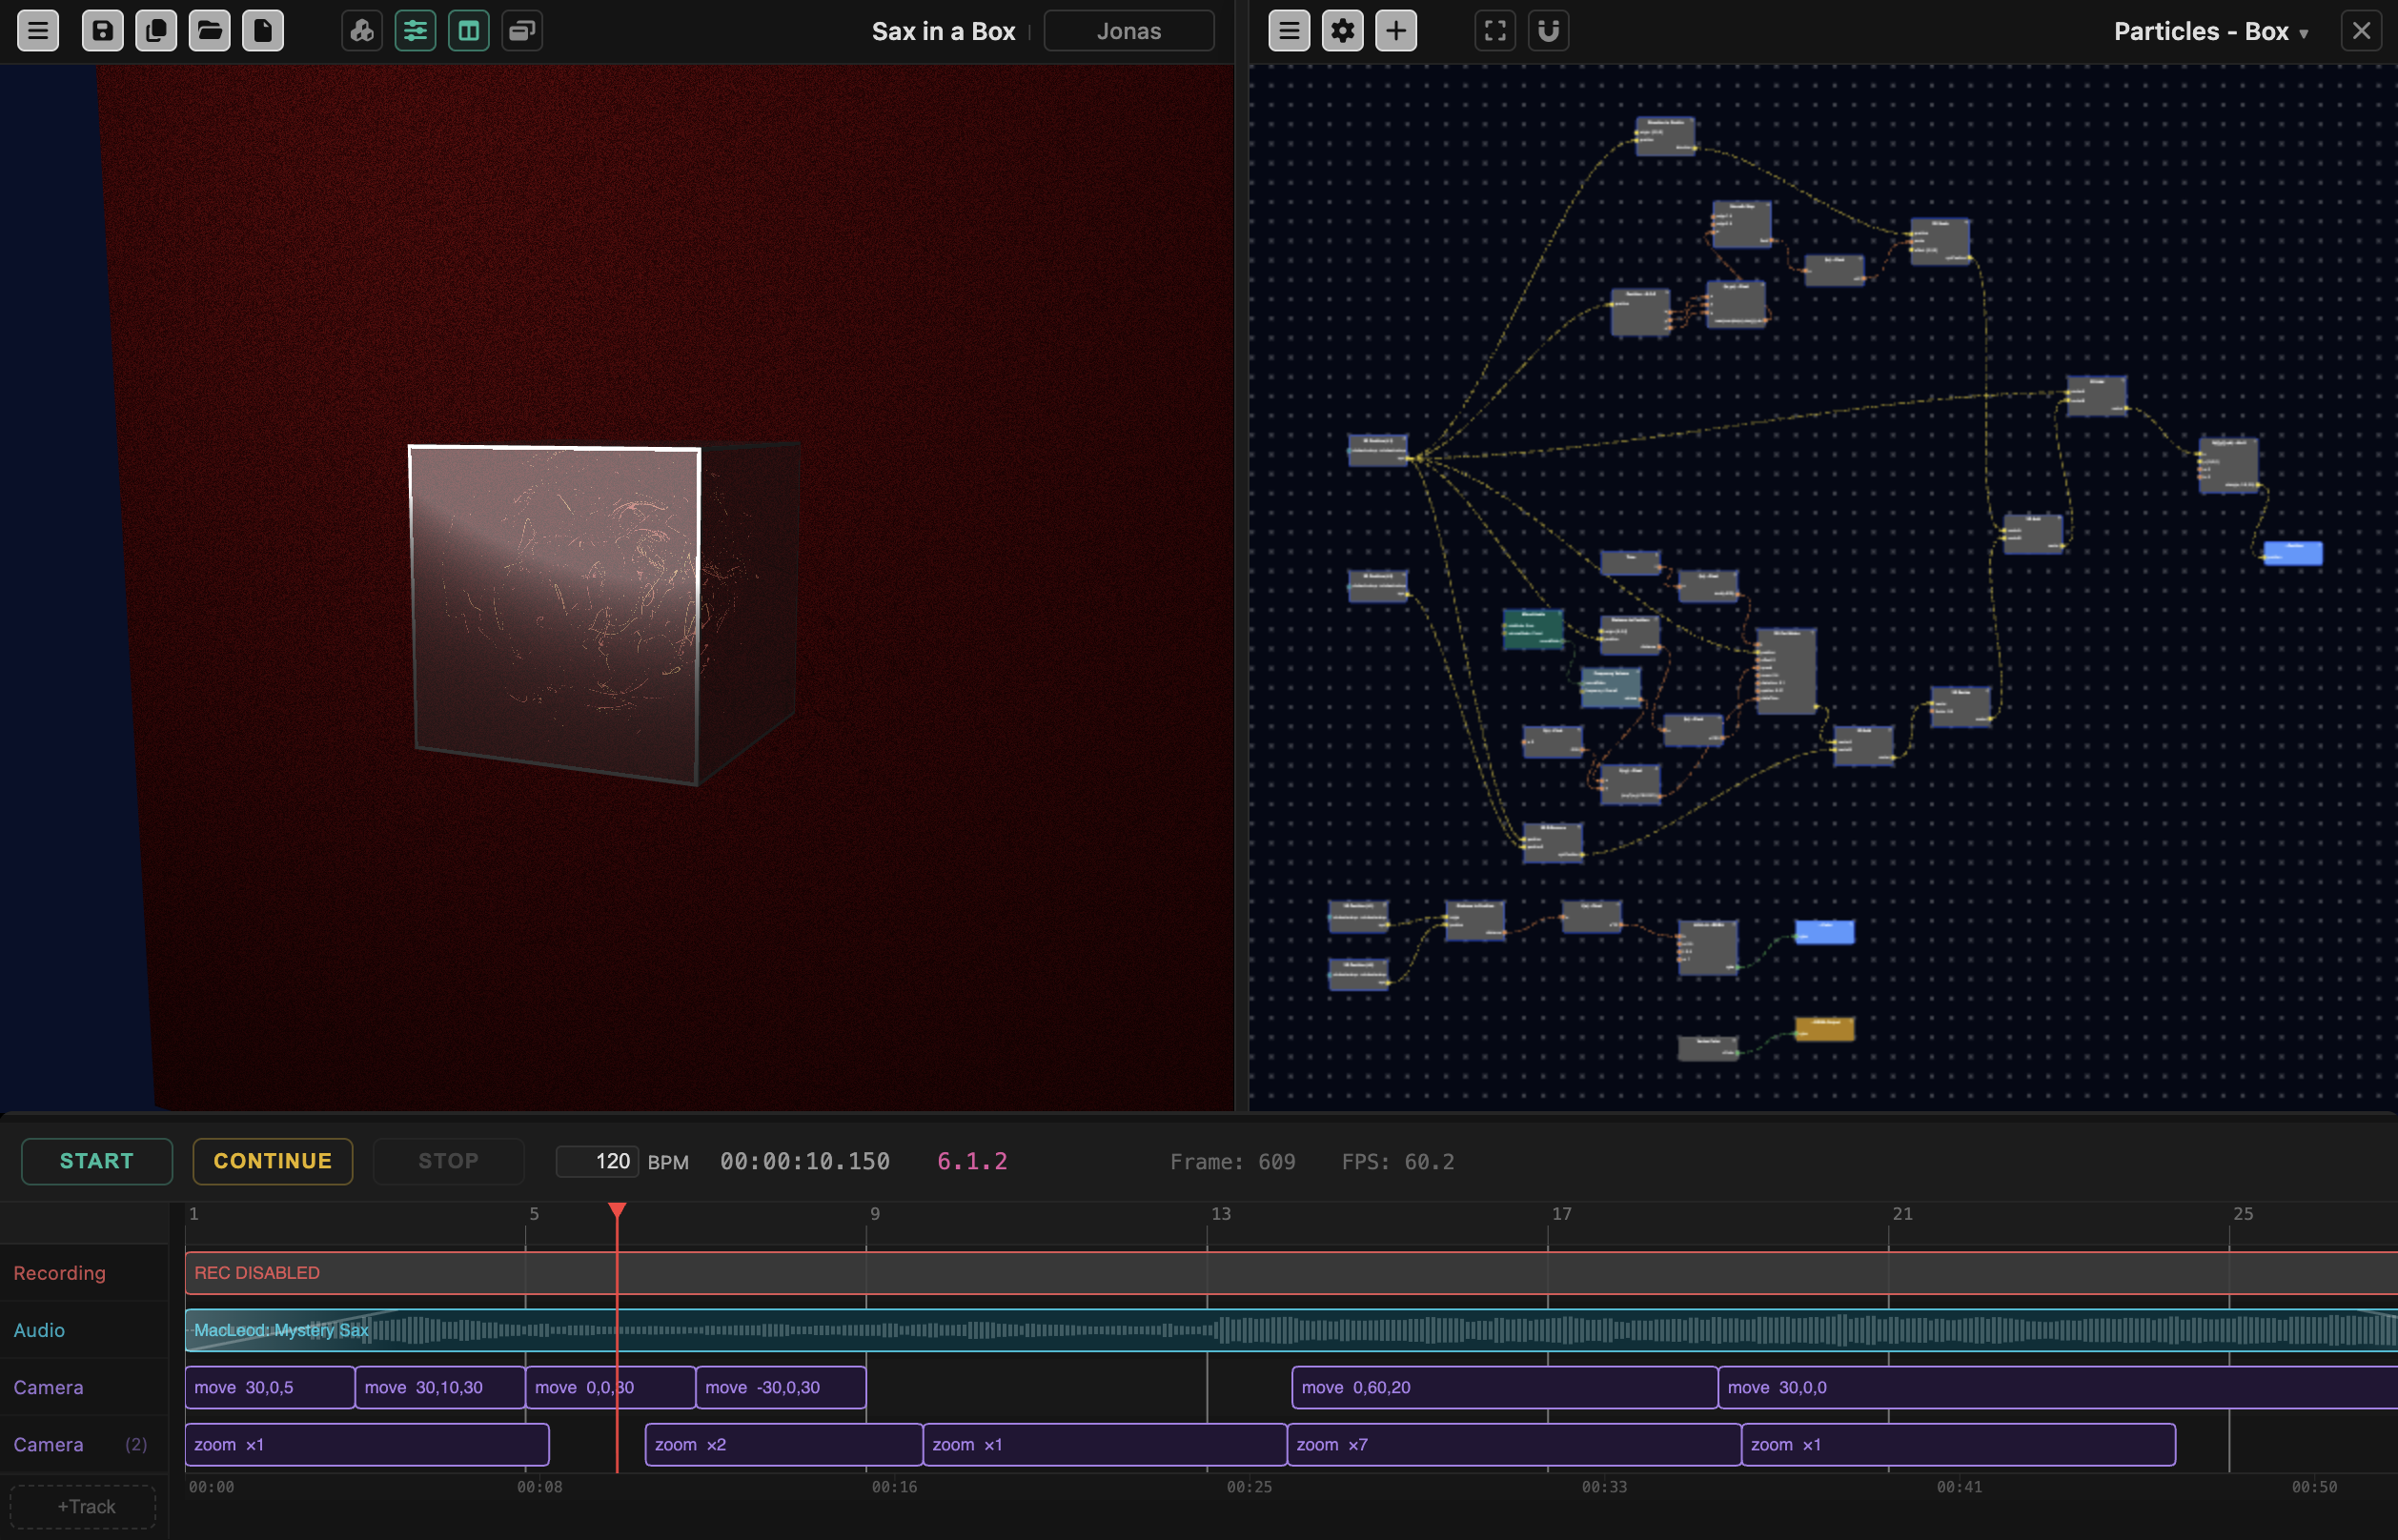
VerkLabs is a creative environment in your browser for making interactive 3D scenes, shaders and music, and for bringing them together on a timeline. It combines a Scene Viewer, a node-based Node Editor, a Runsheet, and My Files, a cloud storage for your projects, textures, sounds, and other assets.
Learn it by doing. These lessons walk you through it, step by step, in the editor:
Start lesson · Follow the coach
Start lesson · Follow the coach
The User Interface
VerkLabs is built around three major areas, each optionally present in both of its two modes:
- Scene Viewer – where you see and interact with the 3D scene itself.
- Node Editor – where you build the materials and deformations applied to individual objects.
- Runsheet – where you schedule how events play out over time, including sound and music (see Runsheet and Instruments and Music).
New to VerkLabs? Choose Learn… in the Drop-Down Menu for a guided lesson that teaches as you build – see Lessons.
Viewer Mode is for exploring a finished scene rather than creating one – the audience for a shared project, rather than its creator. None of the title bars or drop-down menus appear; instead there’s a single Media Bar at the bottom of the screen, similar to an online streaming service, to start and stop the project and control media.
Editor Mode is for building a scene. The Scene Viewer, Node Editor, and Runsheet each get their own controls there, described below – and they follow the same project → object hierarchy as the scene itself. The Scene Viewer’s title bar and drop-down menu work at the project level: the overall editor layout, project properties, and media controls. The Node Editor’s title bar and Properties menu work at the level of whichever single object is currently open in it. The Runsheet timeline operates at the project level.
Scene Viewer
The Scene Viewer is your central window into the 3D world, in both modes. You can simply enjoy the scene animations, or explore interactively using mouse or trackpad gestures, control the camera focus, and interact with individual objects.
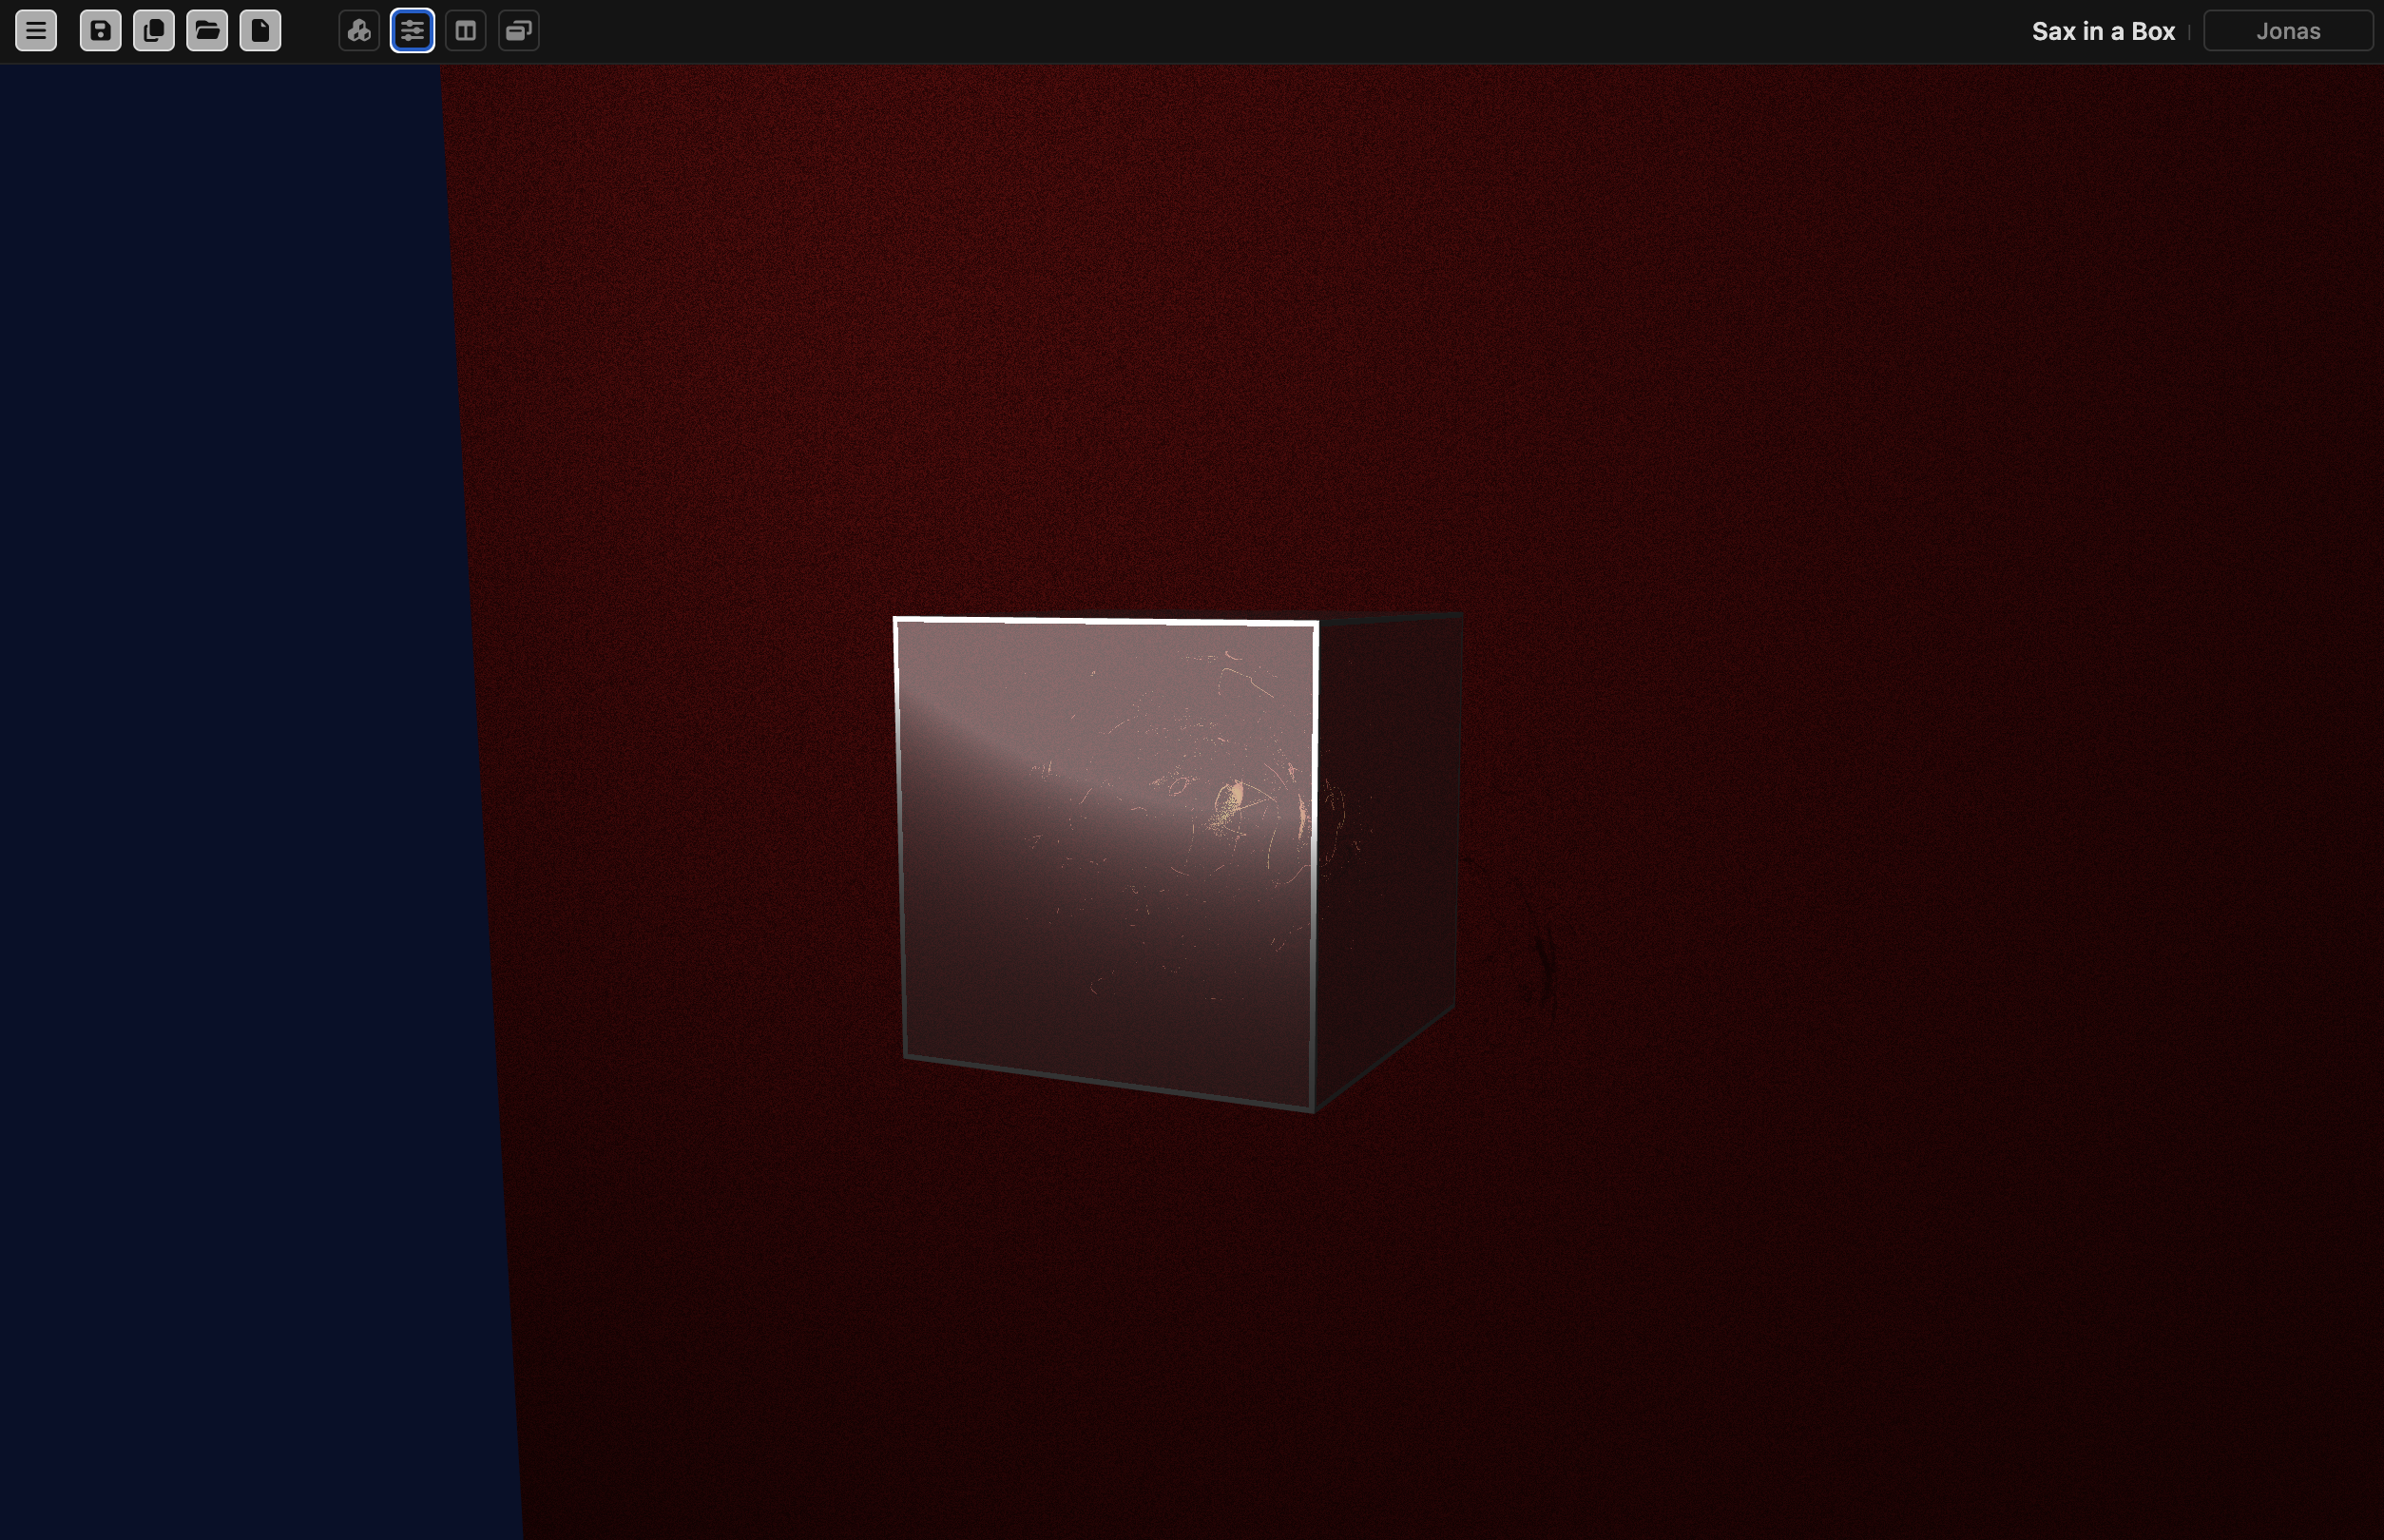
Use the mouse or trackpad to:
- Move and rotate the camera
- Change focal point
Media Bar (Viewer Mode)
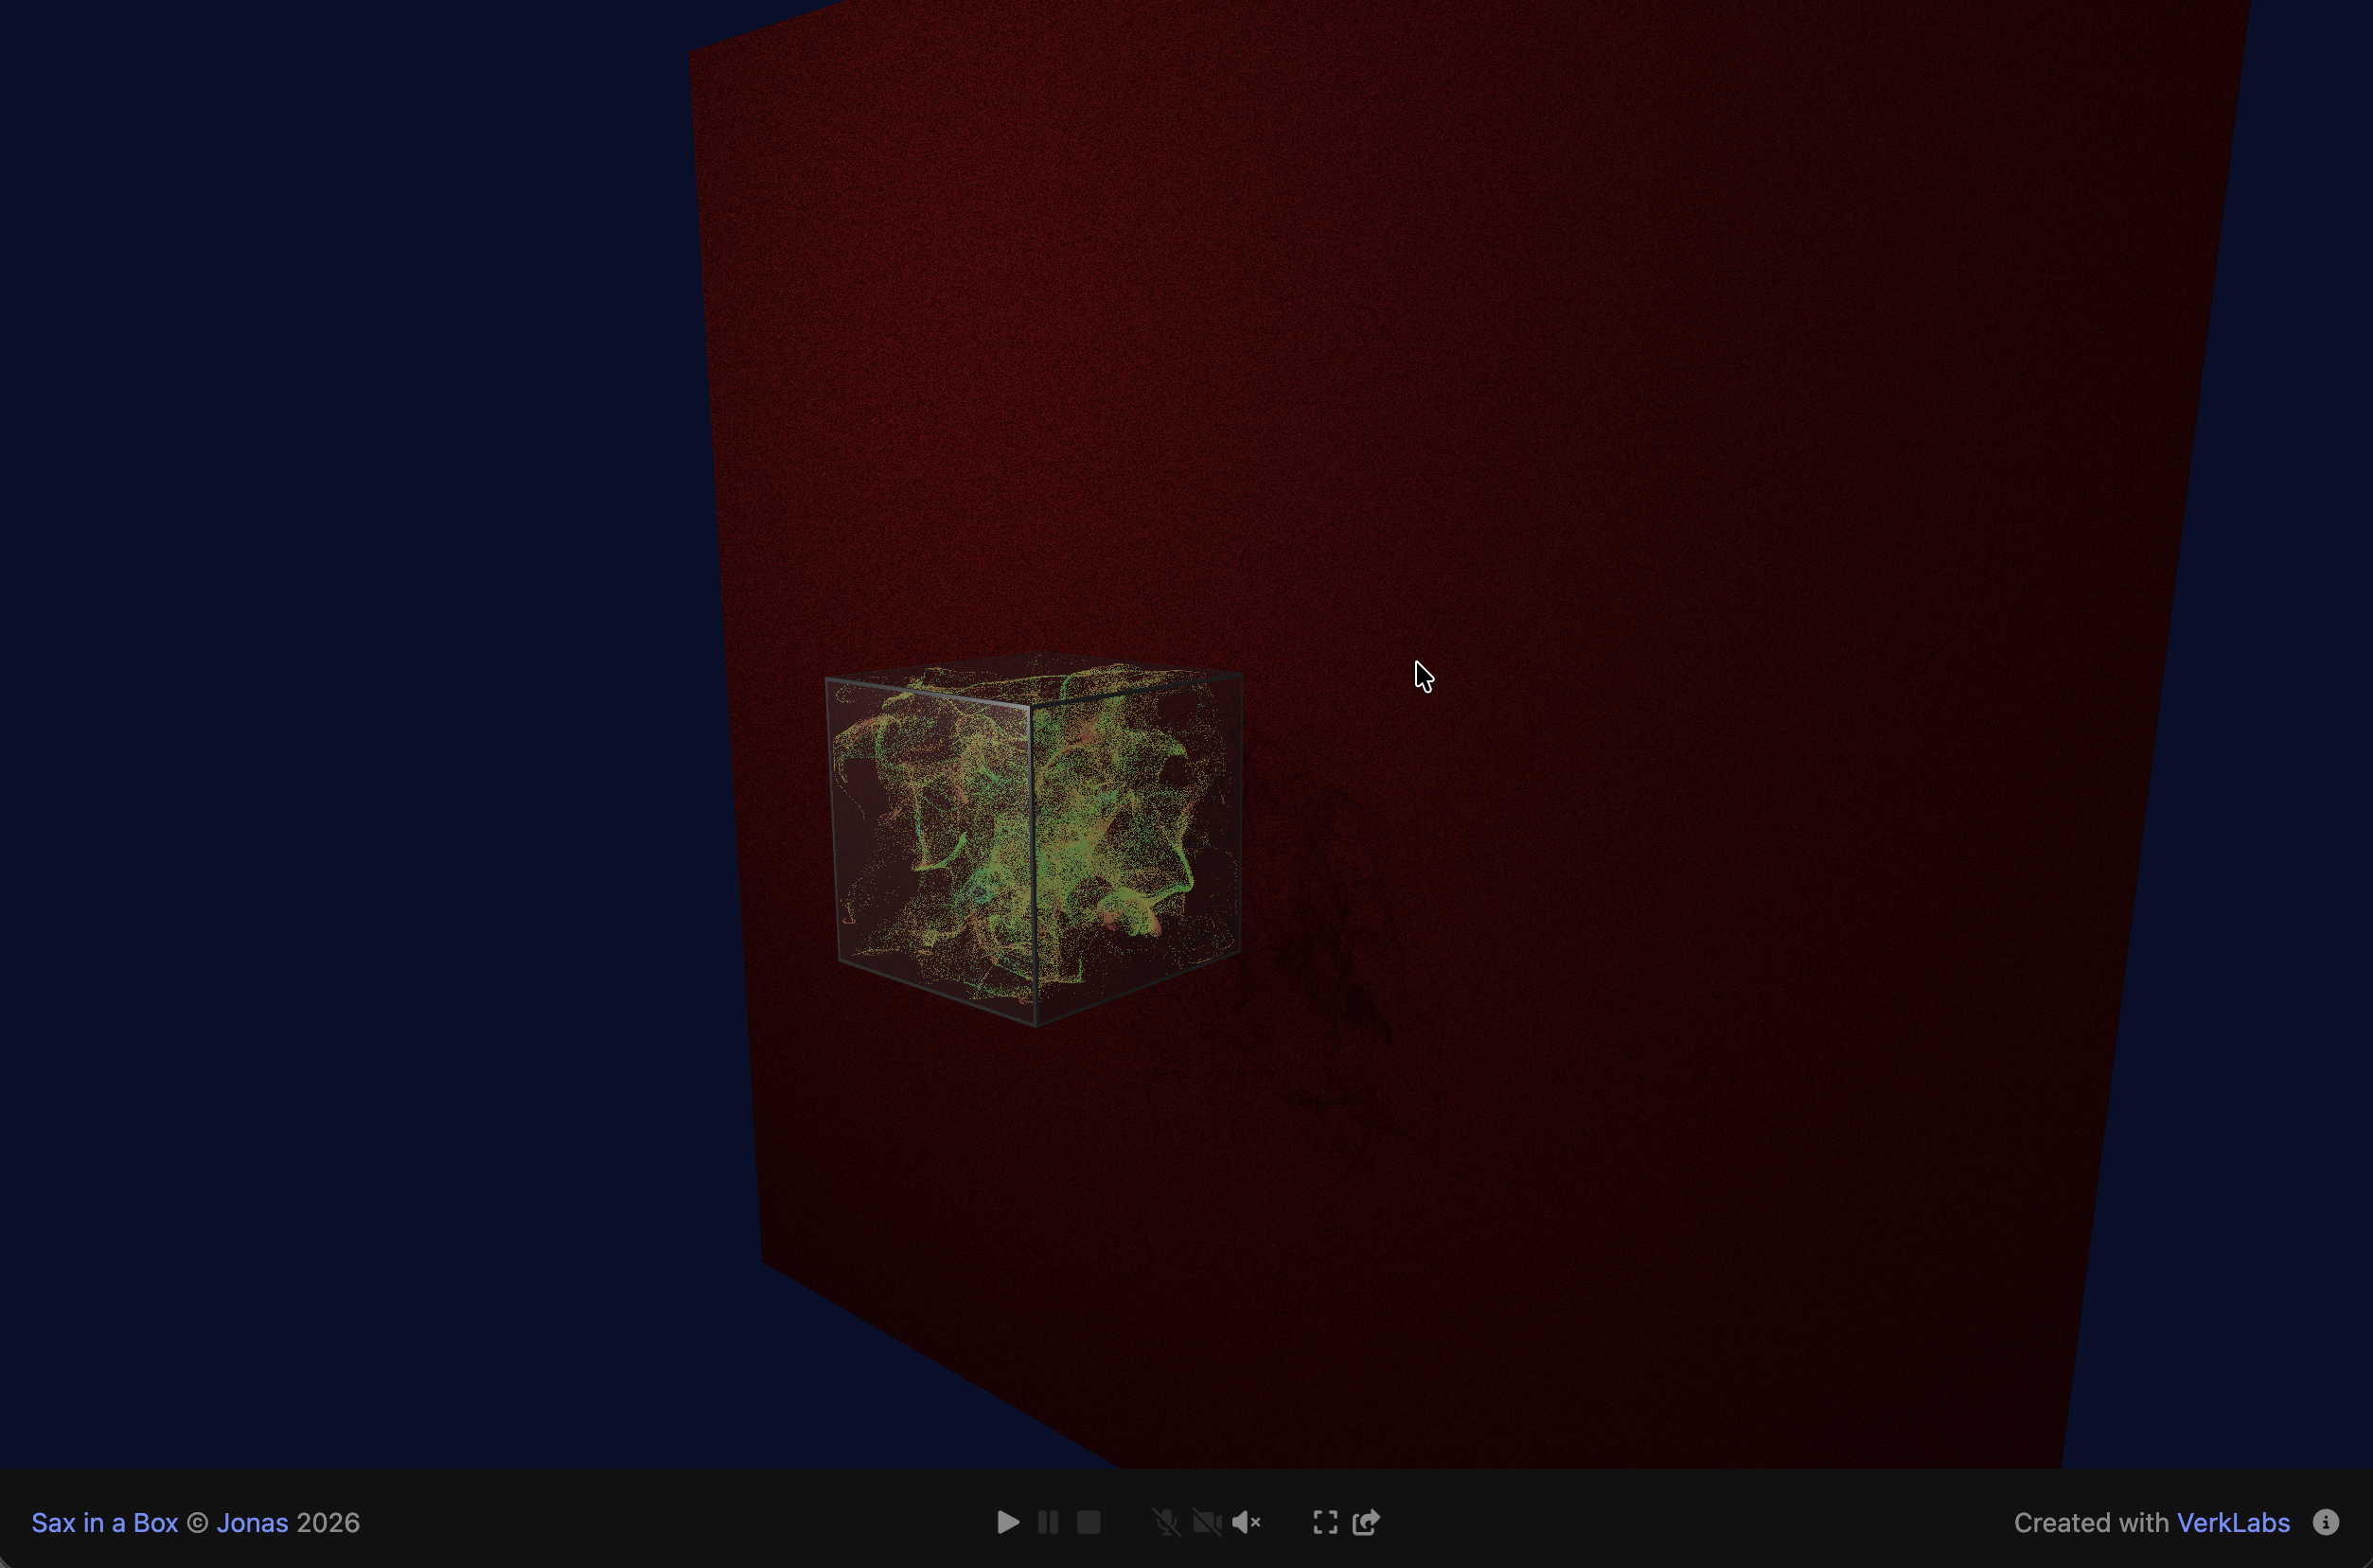
The Media Bar sits at the bottom of the Scene Viewer, and disappears when you’re not moving the mouse, providing an unobstructed view.
It shows the project’s name and creator, playback controls (Start, Pause, Stop), device toggles for Microphone, Camera, and Audio, and Fullscreen and Share buttons.
Canvas Top Bar & Drop-Down Menu (Editor Mode)
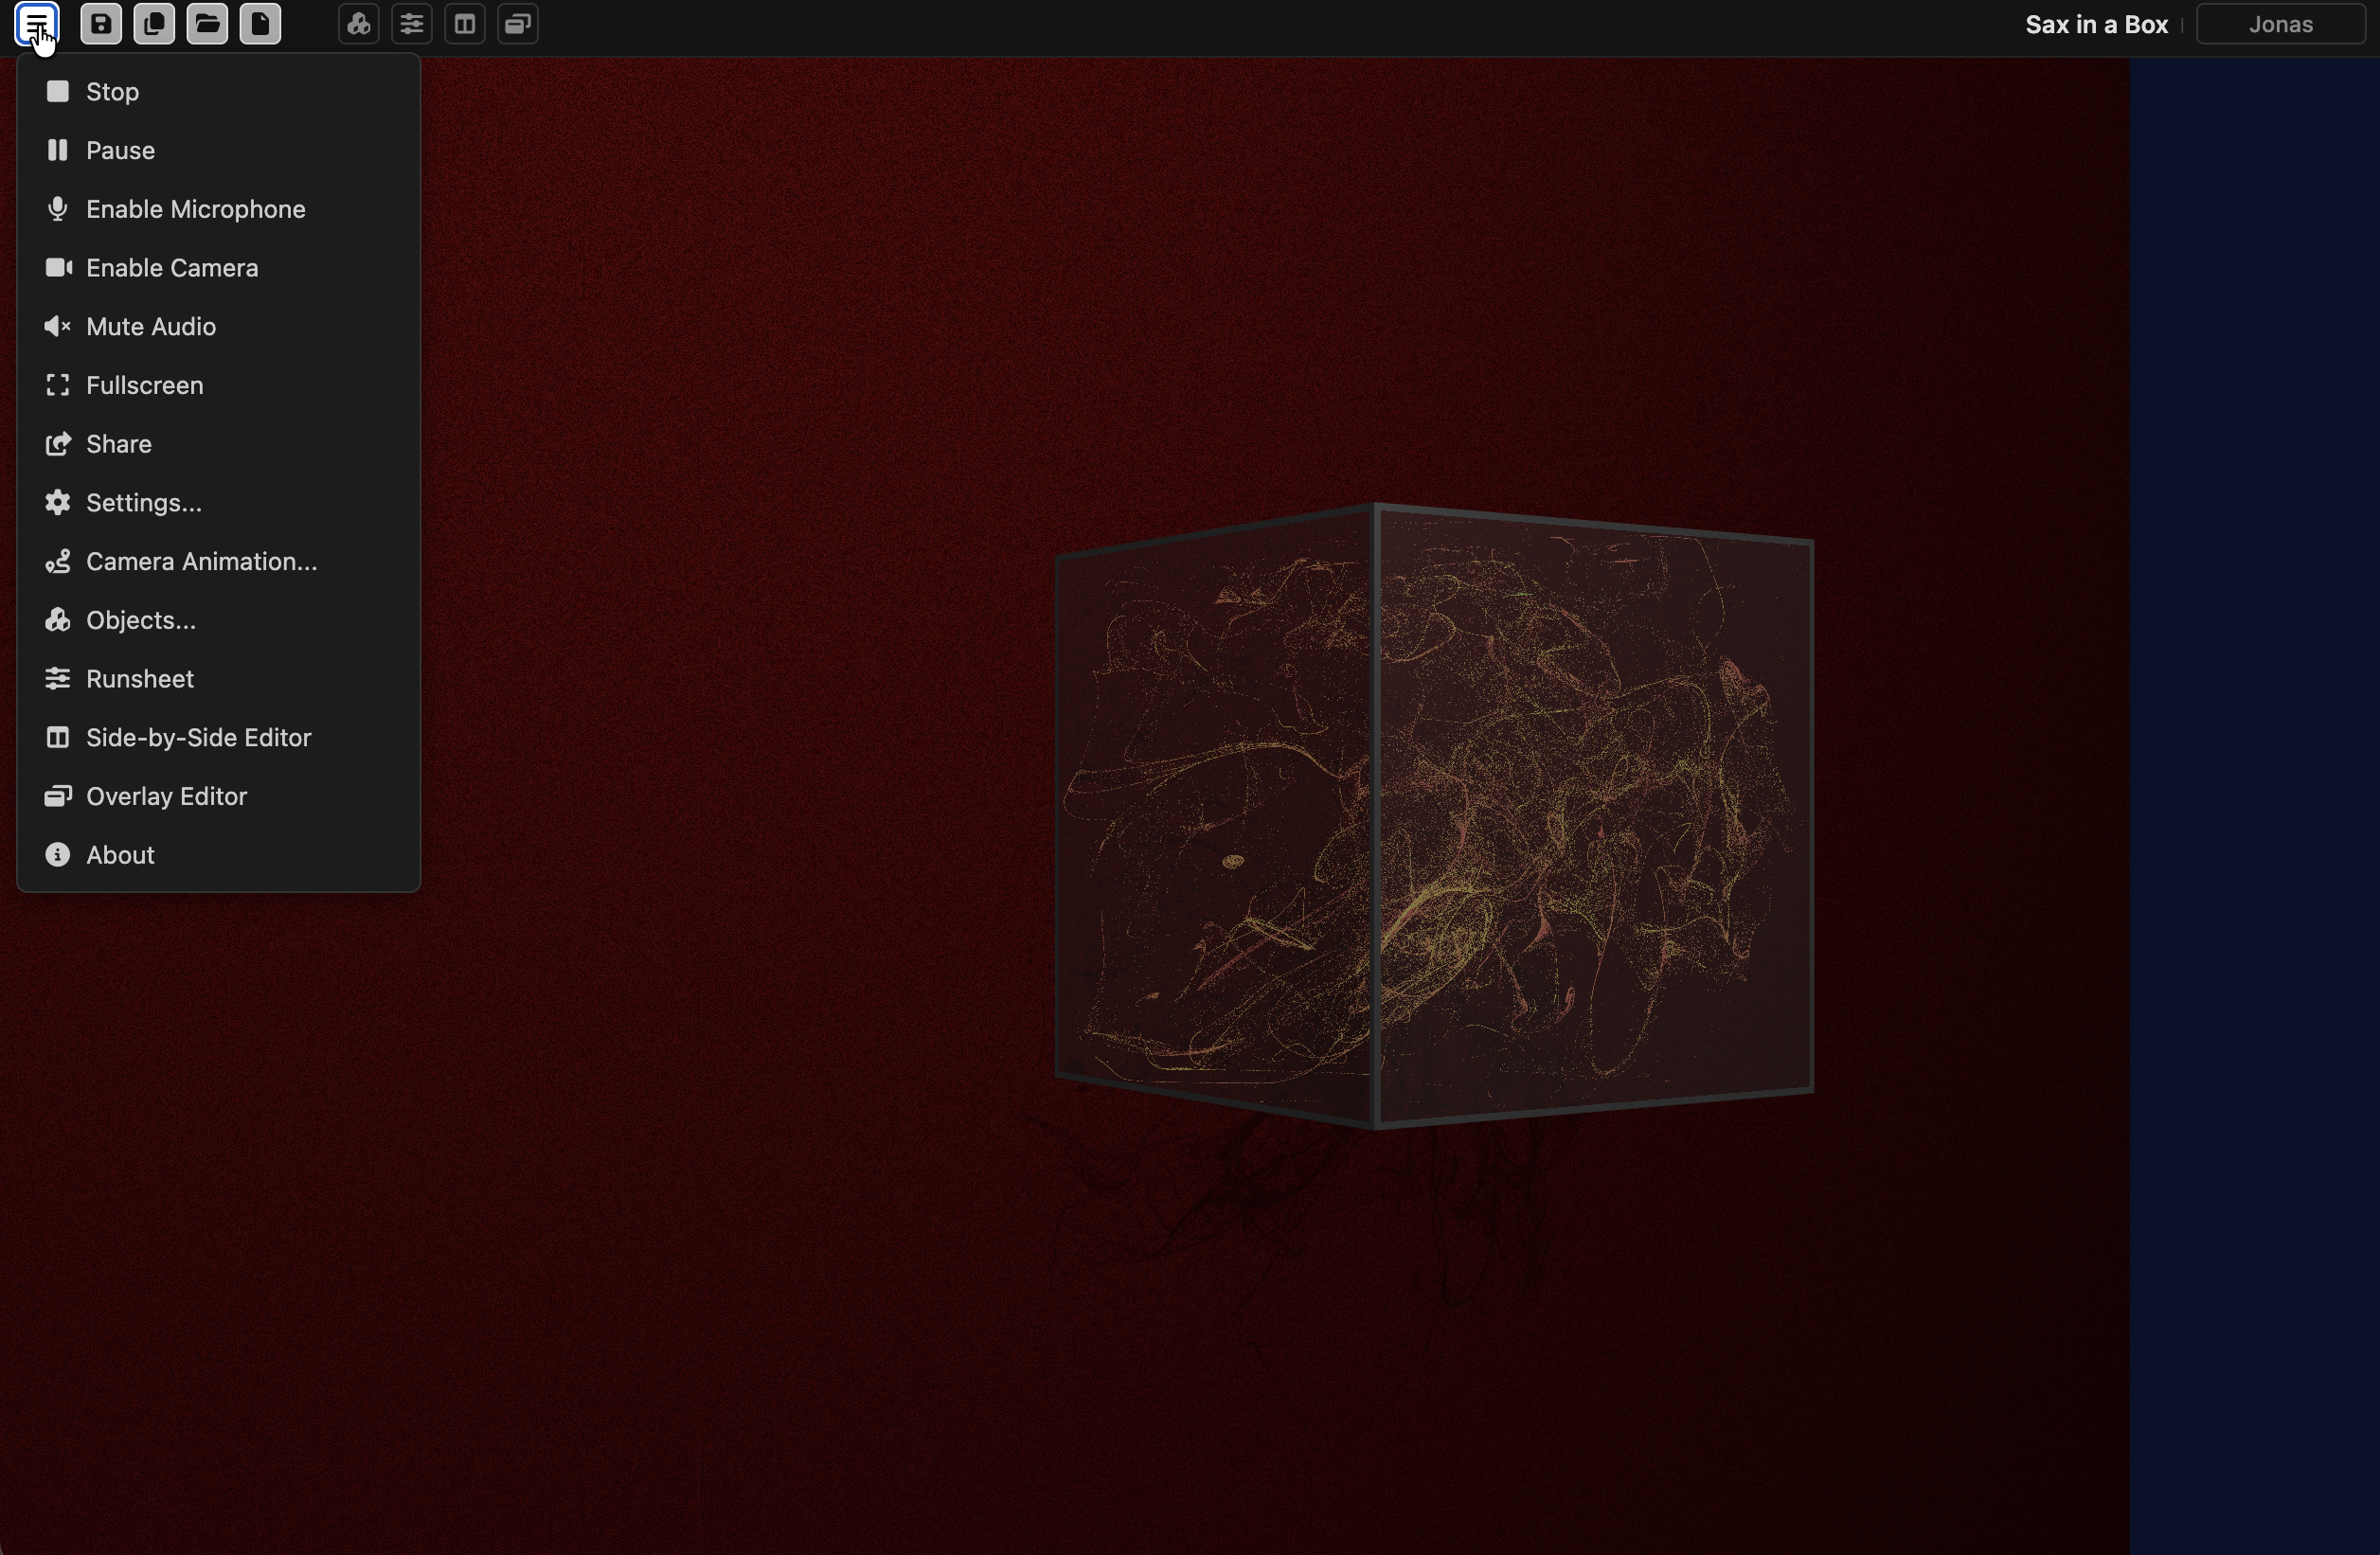
The Canvas Top Bar sits above the Scene Viewer and stays visible at all times while editing. From left to right, it gives you:
- The Drop-Down Menu button (see below) and, next to it, the Start button that runs the project.
- Save, Save As, Open, and New, for managing the current project.
- Add/Remove Objects, which opens the Objects panel.
- Toggle Runsheet, 3D/Objects, and Notes. 3D/Objects shows the Scene Viewer with the selected object’s Node Editor; Notes shows the Piano Roll in place of the Scene Viewer, with the current Music event’s instrument in the node editor instead – see Node Editor and Instruments and Music. Clicking either button again closes it. These live here, rather than on each editor’s own title bar, because they’re an overall interface-layout choice, not something specific to the object being edited.
- On the right, the current project’s file name, and your sign-in status – click it to sign in, or to see your account. Hover over the file name to see the project’s credit – the same “© creator” shown in Viewer Mode’s Media Bar.
The Drop-Down Menu (the icon at the left of the Canvas Top Bar) opens with further controls:
- Stop, Pause, and the device toggles for Microphone, Camera, and Audio.
- Fullscreen and Share, to share a view-only link to your project.
- Disable Navigation and Enable Navigation, which switch the mouse’s control of the camera off and on. With it off, dragging the mouse does not orbit or zoom the camera, so the mouse (its position and its button) is free to play an instrument or drive a shader. A few lessons turn it off for you.
- Present…, to show the Scene Viewer on another display (see Presenting).
- Settings…, Camera Animation…, and Objects… – each opens its own small floating panel on top of the canvas, which you can drag out of the way rather than a full-screen dialog blocking your view.
- Runsheet, 3D/Objects, and Notes, mirroring the same toggles in the Canvas Top Bar.
- About, with information about VerkLabs Designer.
Node Editor
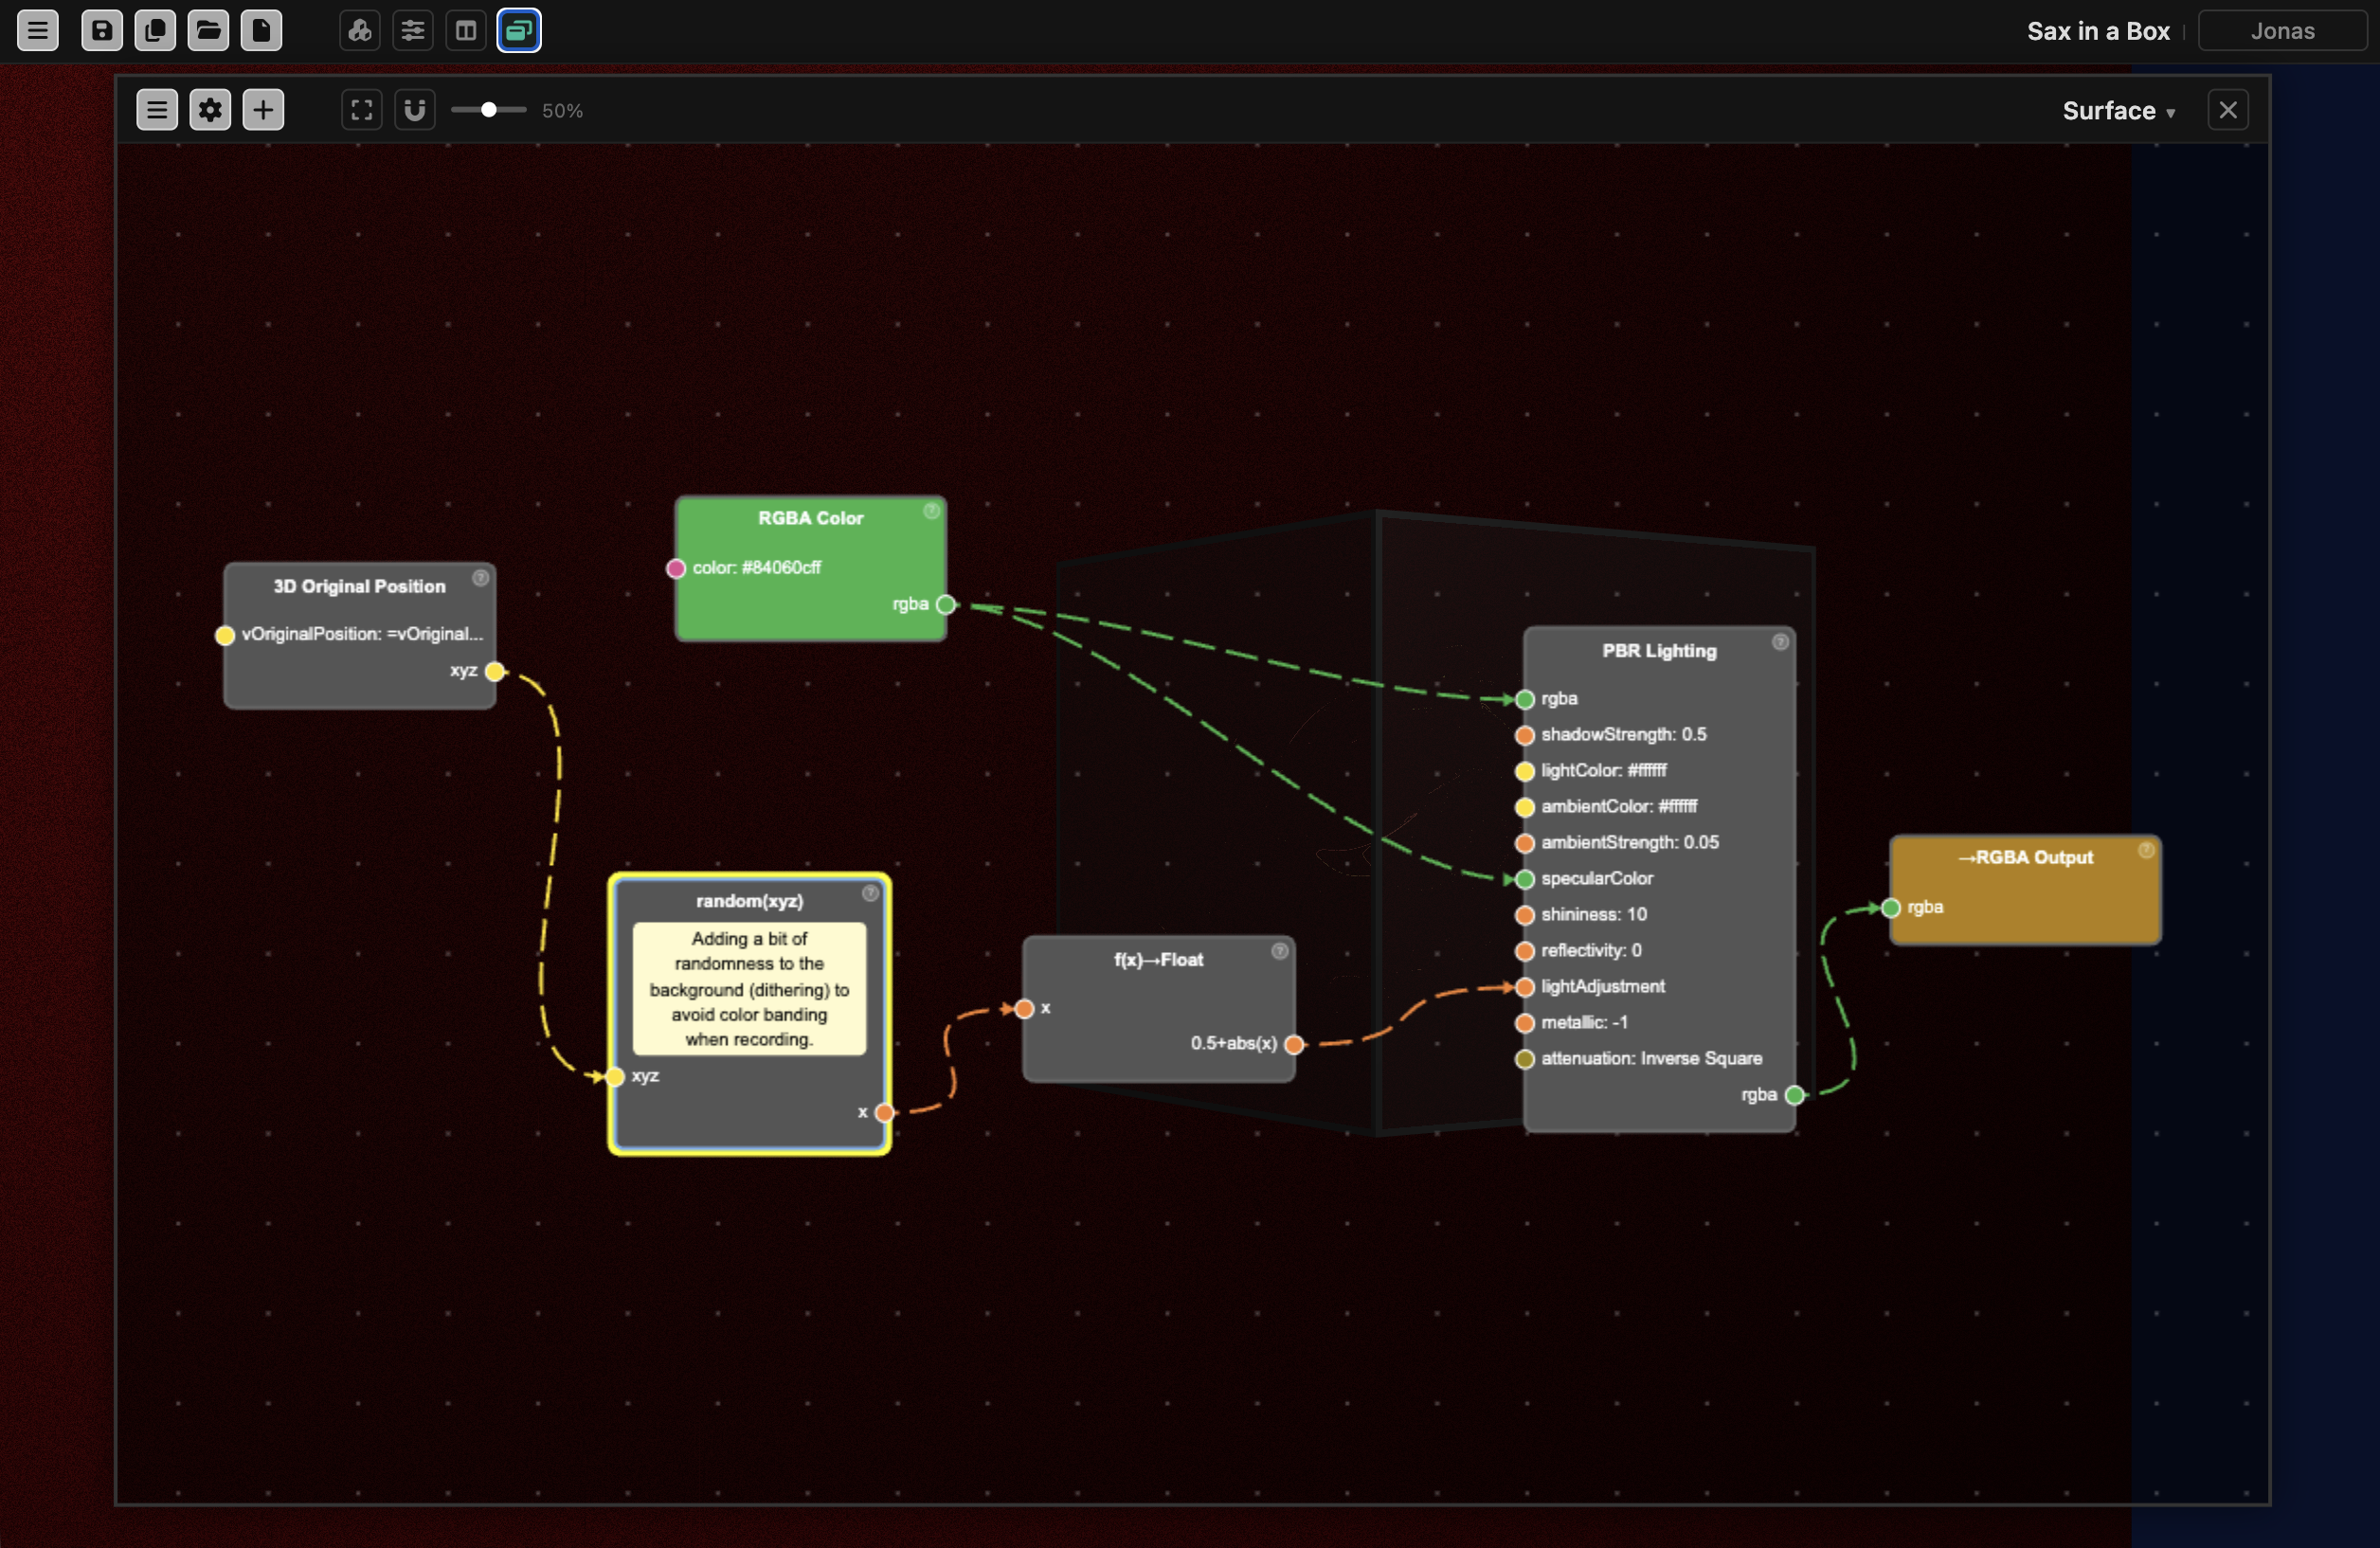
The Node Editor provides a visual way to design materials and deformations using nodes interconnected in a node graph, for whichever object it’s currently open on.
You can:
- Select, move, and connect nodes
- Adjust their properties
- Create custom node types
- See live previews of your material outputs
Color-coded connections, warnings, and selection tools make it clear how data flows between nodes.
It’s opened with the 3D/Objects button in the Scene Viewer’s own Canvas Top Bar or Drop-Down Menu (see above), and can be shown in two ways: Side by Side with the Scene Viewer, splitting the screen between the two, or Floating on top of it, where it can be dragged and resized like any other panel. Switch between them with the toggle button in the Node Editor’s own title bar – see Object Properties.
Within the Node Editor’s own title bar, the Properties button opens a floating panel for the object currently open in it, where you can fine-tune properties such as label, material, size, transparency, and orientation/animation parameters (position, rotation, orbit, scale, etc.).
Node Menu
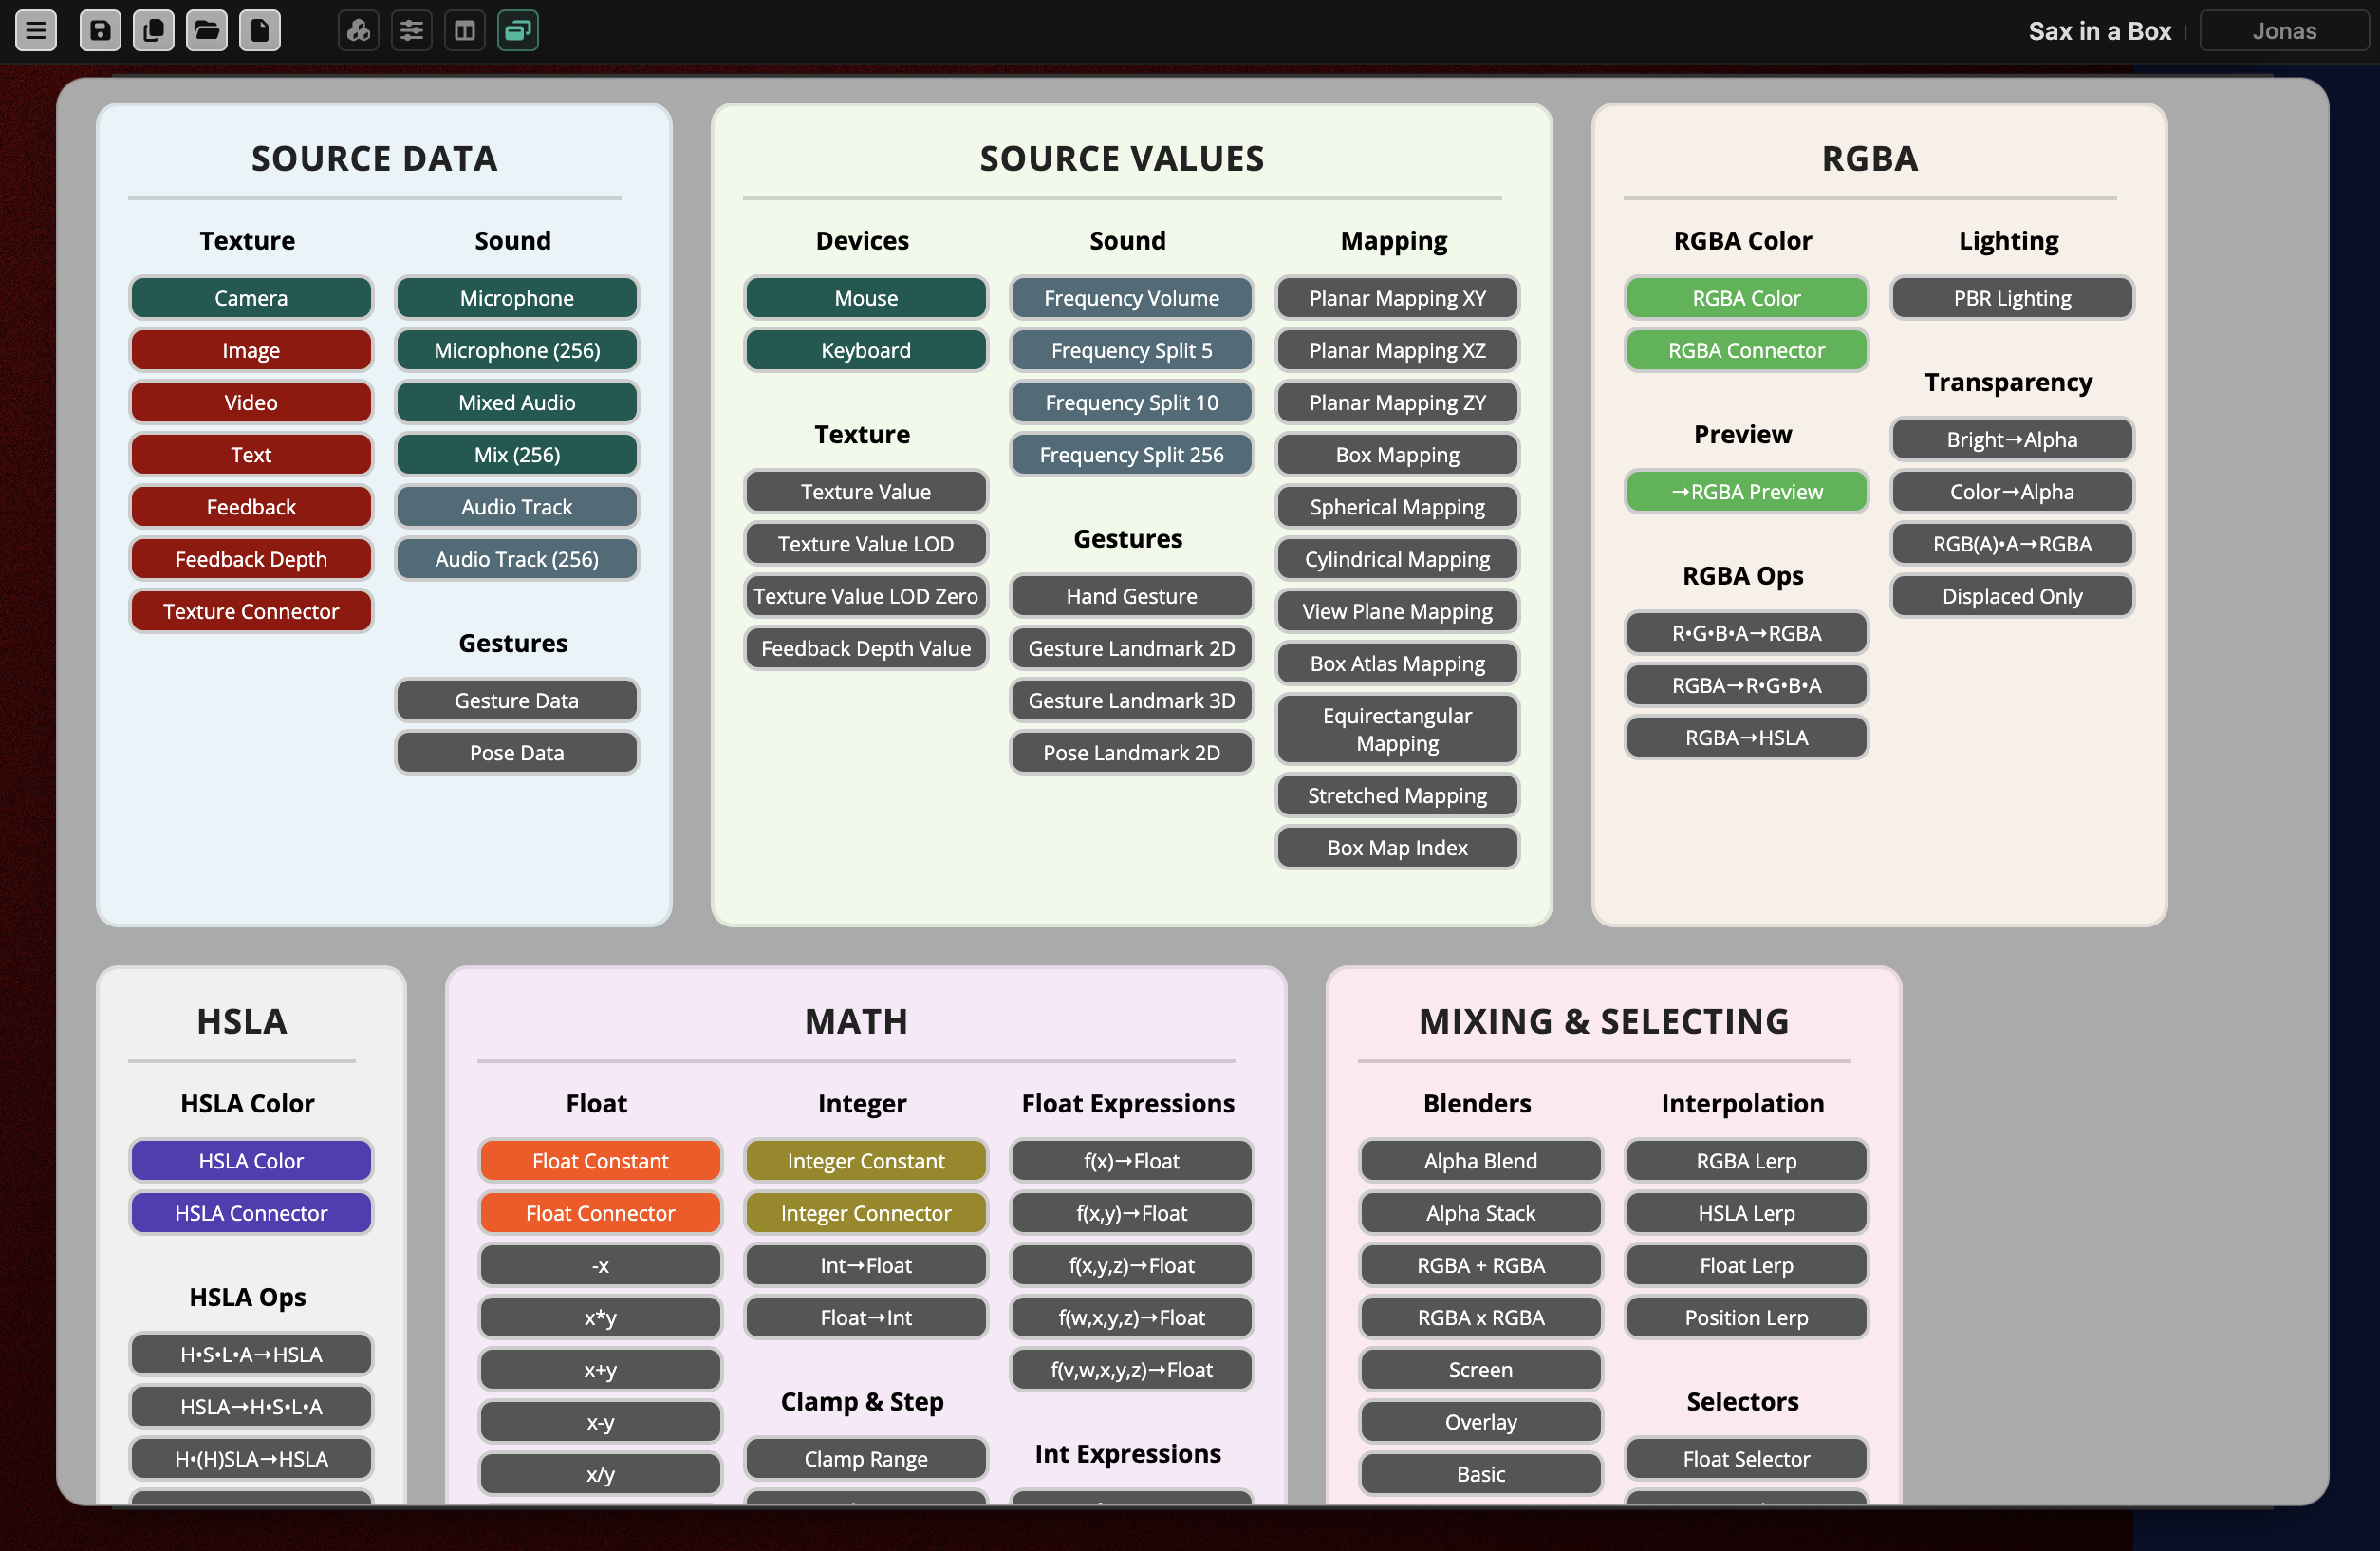
With the Node Menu, you can add nodes to the graph you’re currently working on in the Node Editor.
The Node Menu is grouped by category:
- Source Data, Source Values
- RGBA, HSLA, Numbers
- Mixing & Selecting Colors, RGBA Effects
- Vectors, Drawing, Texture Operations
- UV Operations, 3D Operations
- Animated Values, Environment Values
- Vertex Output
- Annotations, Custom Nodes
If your node graph is becoming too complicated, or you have defined interesting behaviors you might want to reuse, you can select a subset of nodes and save them as a Custom Node that you can re-use throughout your project. Nodes can also be copied and pasted between different projects.
Runsheet
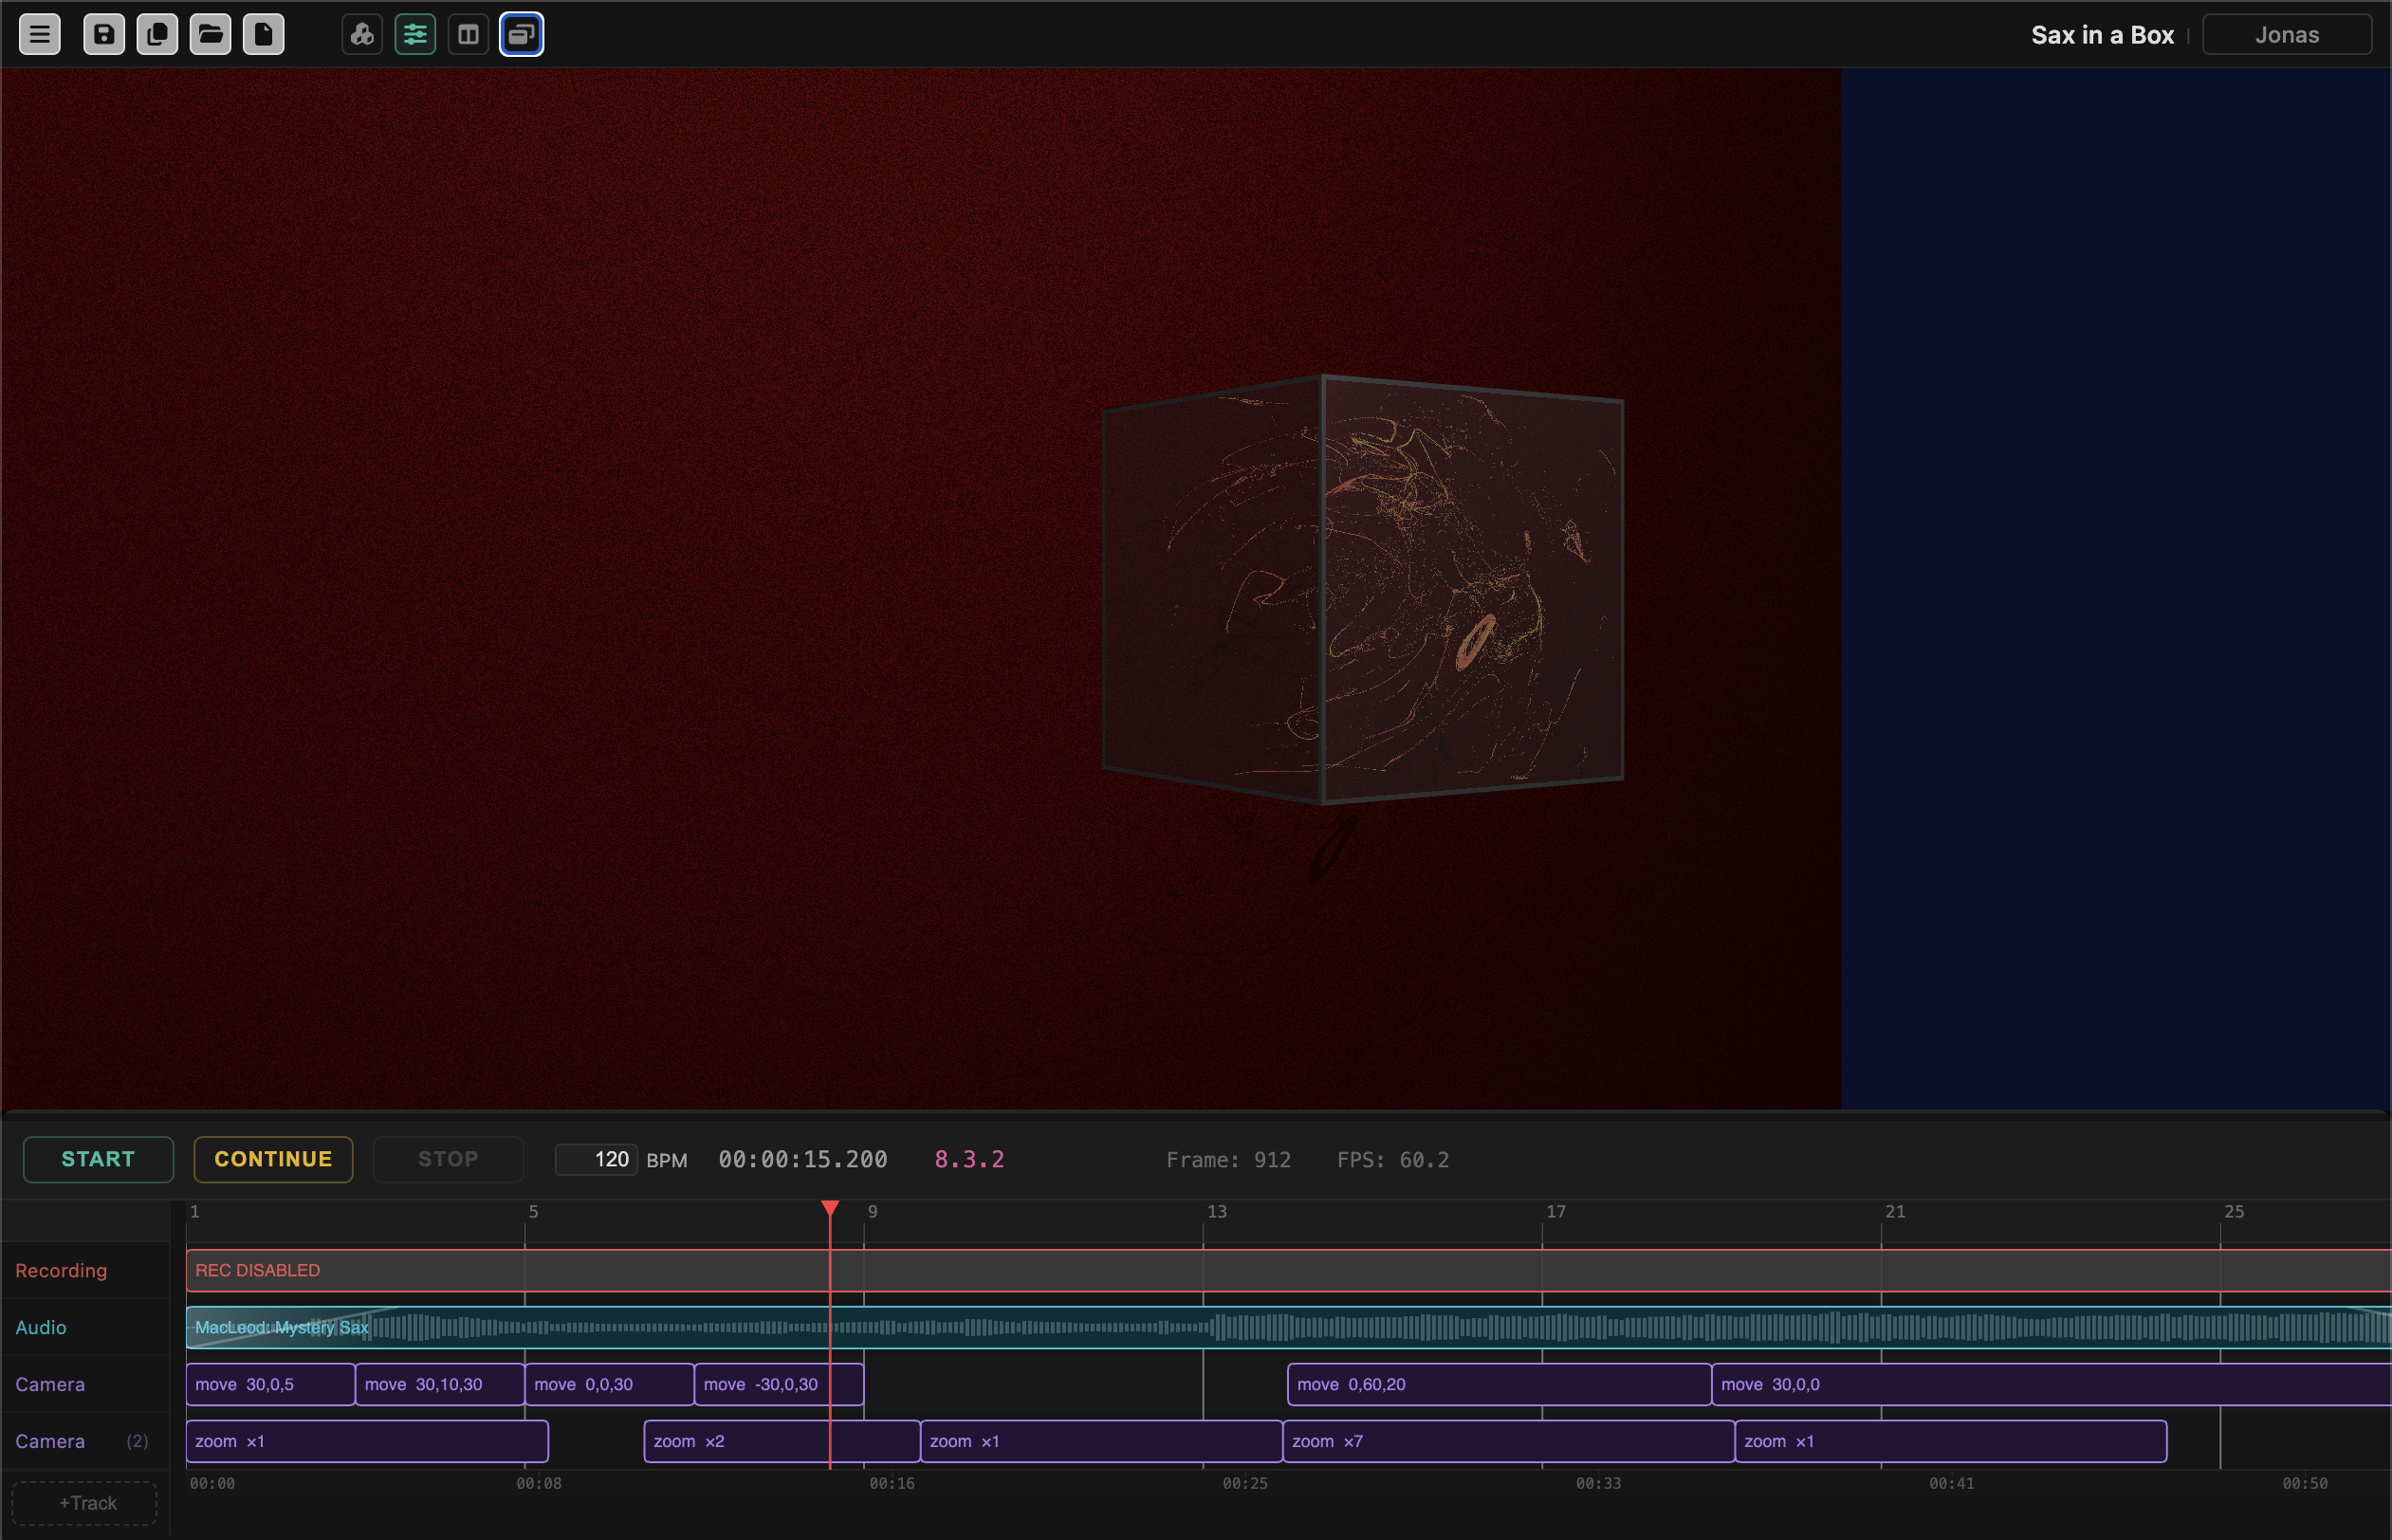
The Runsheet controls the overall timing of events in the scene. Toggle it open from the Canvas Top Bar or Drop-Down Menu. It’s a multi-track timeline, docked at the bottom of the Scene Viewer, for scheduling events to run automatically over the course of a playback rather than triggering them by hand.
Tracks are grouped by kind: Recording, Audio, Music (notes played by instruments you build or pick from the library), Camera (animate, move, turn, zoom), Params (shader/uniform values), Objects, Motion and Light (move, aim, strength and color of the scene’s light), and on-screen overlays – Title, Background, Text, Nodes, Logo, and QR Code. Add events to a track, position and resize them along the timeline, and use the same Start, Pause, and Stop controls as elsewhere to run the sequence from the beginning, or continue from wherever you paused.
The Runsheet chapter describes every track and event in detail, and Instruments and Music covers making sounds and playing them from the Runsheet, including the Piano Roll – opened with the Notes button above, it takes the place of the Scene Viewer (or floats on top of it) for drawing a melody note by note.
Run on Load and Run Loop – whether the Runsheet starts automatically and whether it repeats – are set in the Settings panel, alongside the Rec. Runsheet option to record a run automatically.
My Files
Editor Mode only.
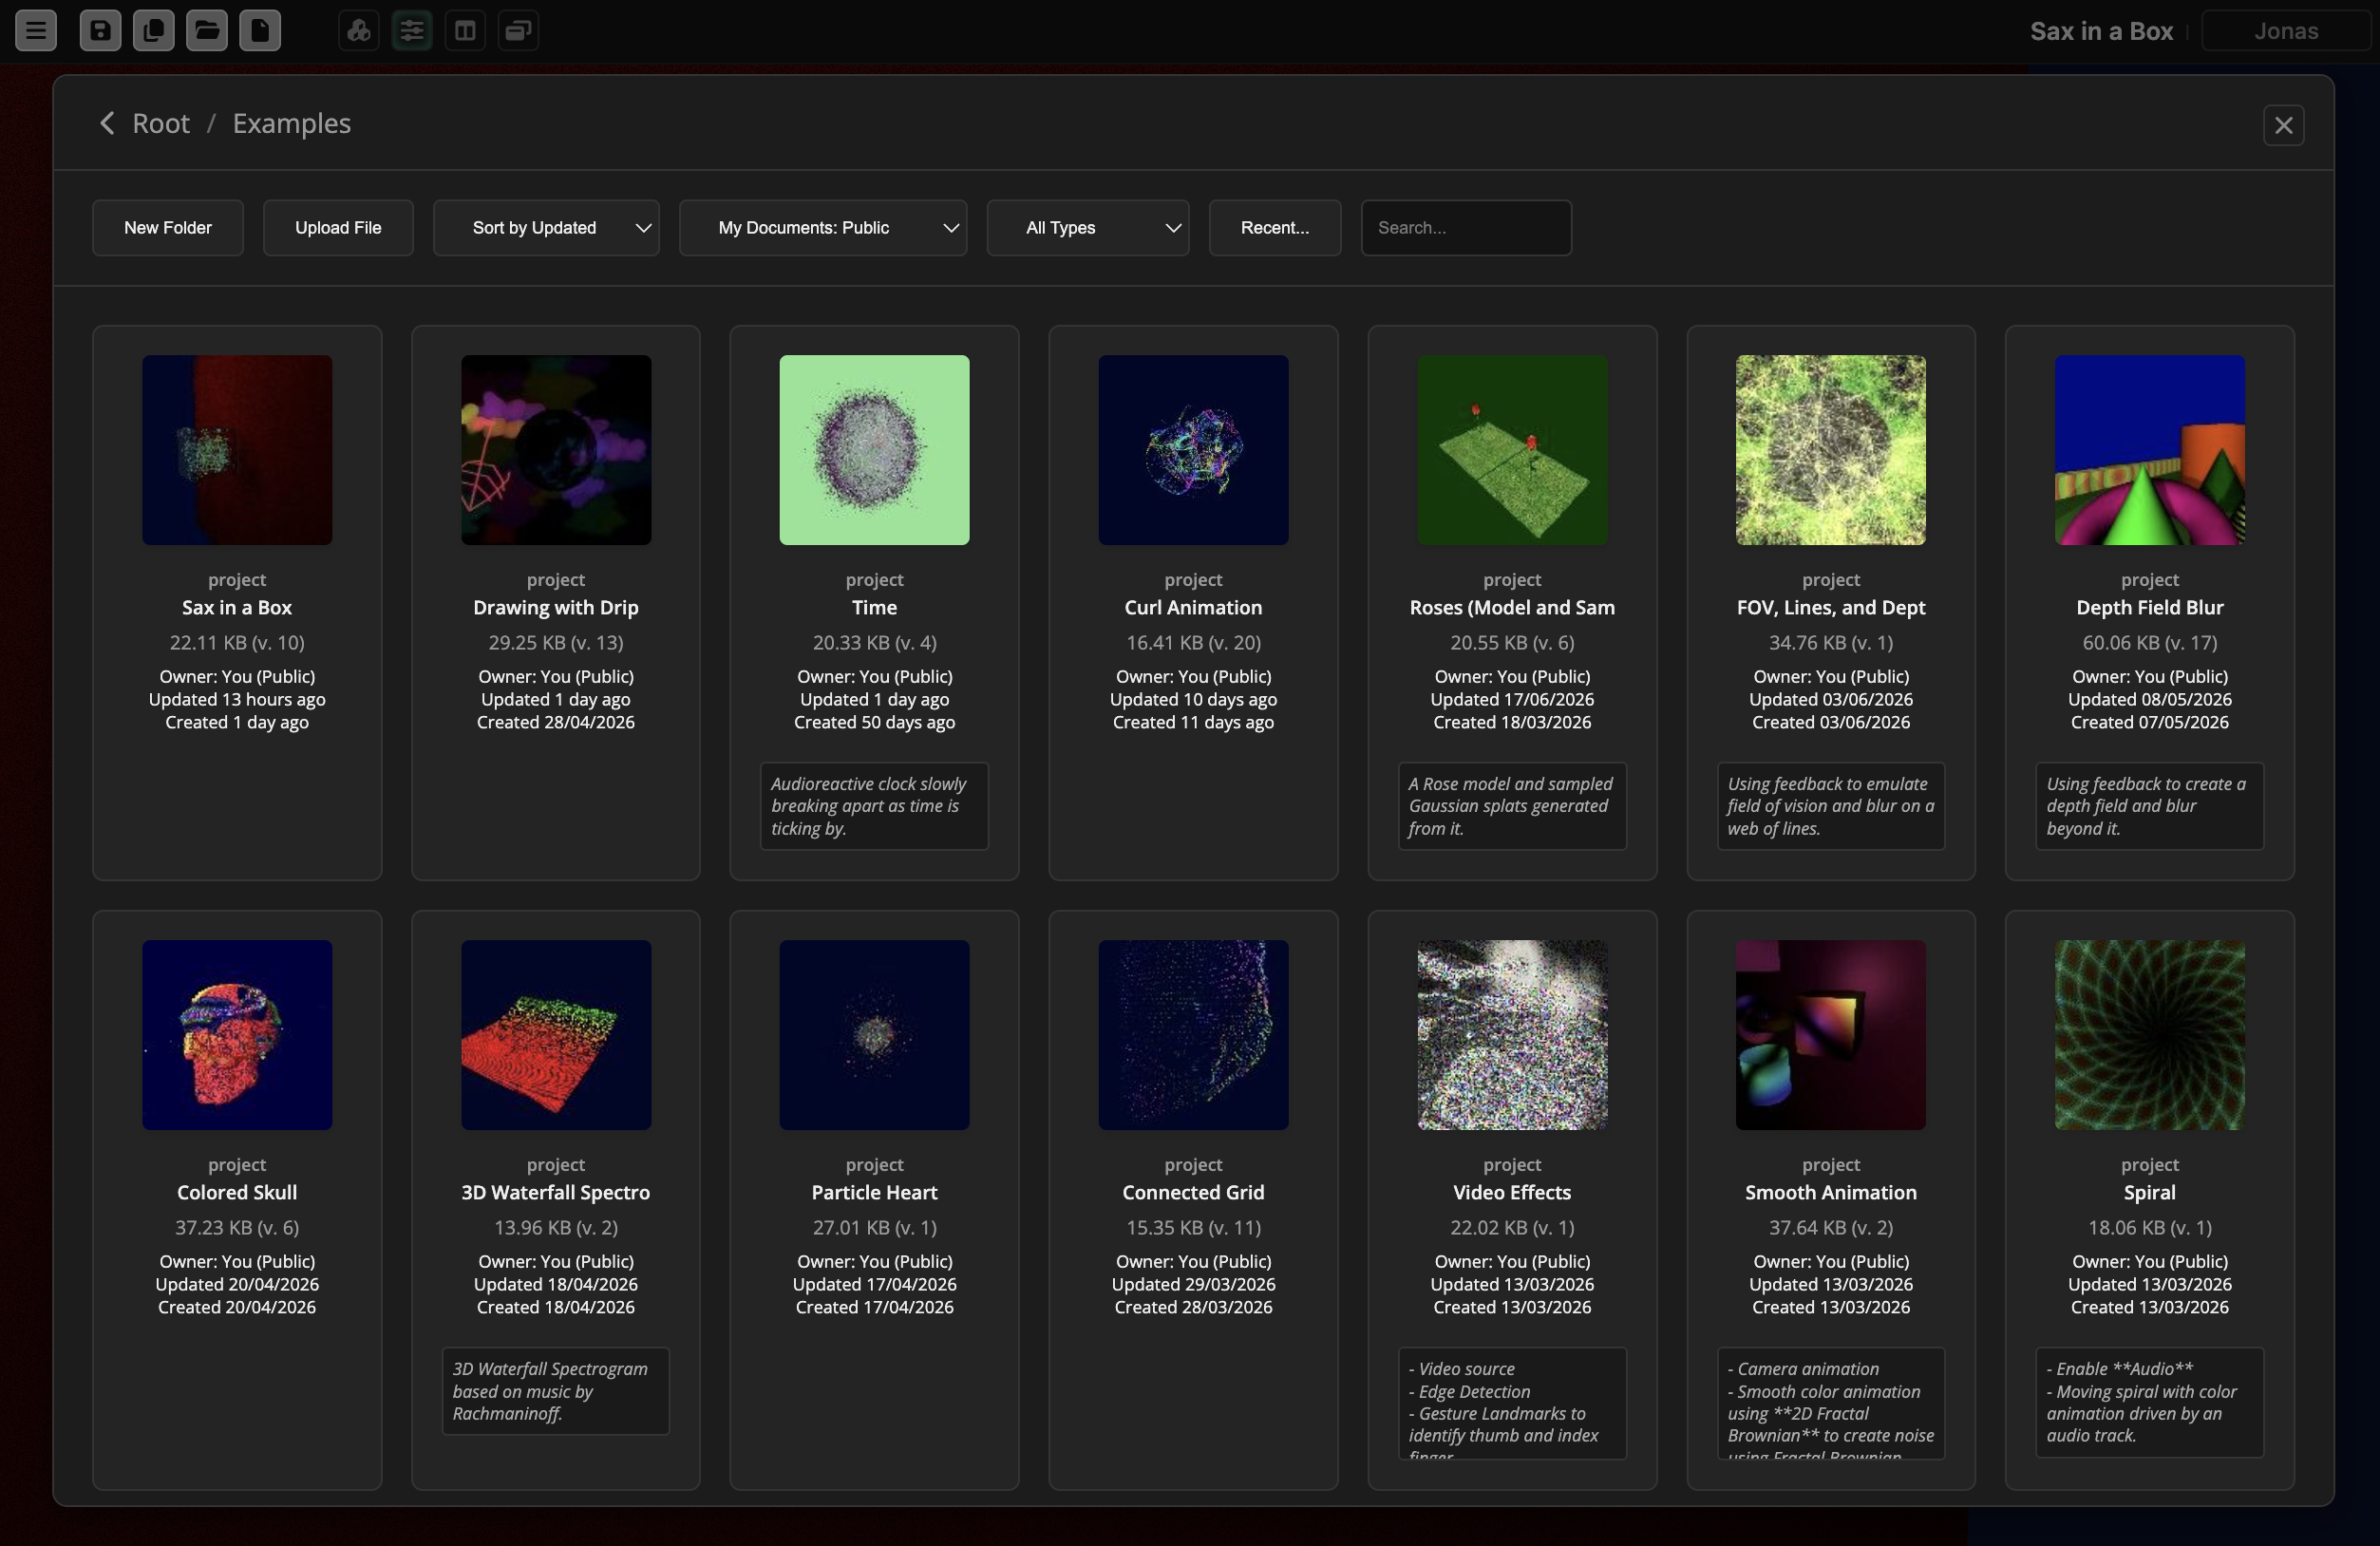
You save your projects and assets in My Files, reached from the Scene Viewer’s own Canvas Top Bar (Save/Save As/Open/New). Here you can browse folders, filter or sort documents, and manage permissions or shared access. My Files also provides tools for editing document properties, uploading, and deleting assets.